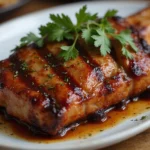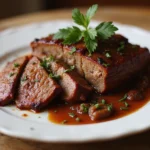
Grilled BBQ chicken legs are a staple for summer barbecues, bringing together smoky, savory flavors that tantalize the taste buds.
The crispy skin and juicy meat create a delightful contrast that keeps everyone coming back for more.
I first fell in love with this dish during a family cookout, where the aroma of sizzling chicken filled the air and brought everyone together.
Whether you’re cooking for a weekend gathering or a casual weeknight dinner, this recipe is sure to impress with its simplicity and mouthwatering results.
The History and Cultural Significance
• Grilled BBQ Chicken Legs Recipe That’s Crispy And Juicy traces its origins to the Southern United States, where it was originally created by local families during gatherings.
• The dish evolved over decades as various regional barbecue styles emerged, eventually becoming a beloved staple across the nation.
• In Southern culture, this dish traditionally appears at summer picnics and family reunions, symbolizing hospitality and togetherness.
• While many variations exist across different regions, the authentic version maintains a balance of smoky and sweet flavors that sets it apart from imitations.
Recipe Overview
Nutritional Information (per serving)
Ingredients
Essential Equipment Guide
Grill: The grill is essential for achieving that perfect char and smoky flavor. Look for a grill that heats evenly and has adjustable heat settings for better control.
Meat Thermometer: A reliable meat thermometer ensures that your chicken reaches the safe internal temperature of 165°F. Choose one with quick readings for convenience.
Brush for Sauce: A basting brush is necessary for applying BBQ sauce evenly. Silicone brushes are easy to clean and can withstand high temperatures.
Preparation Methods
Marinating: Marinating is crucial for infusing flavor and ensuring the chicken remains juicy during grilling. Aim for at least 1 hour, or overnight for best results.
Basting: Basting the chicken with BBQ sauce while grilling adds layers of flavor and helps achieve that sticky glaze. Use a brush to apply the sauce during the last few minutes of cooking.
Resting: Allowing the chicken to rest after grilling is important for redistributing juices. Let it sit for at least 5 minutes before serving to maximize juiciness.
Step 1: Prepare Marinade

In a large bowl, combine olive oil, apple cider vinegar, honey, Worcestershire sauce, garlic powder, smoked paprika, salt, and black pepper.
Whisk the ingredients together until well blended.
Make sure the mixture is smooth with no lumps.
This marinade will help tenderize and flavor the chicken legs.
Step 2: Marinate Chicken

Add the chicken legs to the bowl with the marinade.
Toss the chicken until each piece is well coated in the marinade.
Cover the bowl with plastic wrap or transfer the chicken to a resealable bag for marinating.
Refrigerate for at least 1 hour or overnight for maximum flavor.
Step 3: Preheat Grill

Before grilling, preheat your grill to medium-high heat, around 375°F to 400°F.
Make sure the grill grates are clean and lightly oiled to prevent sticking.
A properly preheated grill will create a nice sear on the chicken.
Check the heat by holding your hand above the grill; you should feel a strong heat at this temperature.
Step 4: Grill Chicken Legs

Place the marinated chicken legs on the grill, skin side down.
Cook for about 10-12 minutes on the first side without moving them to achieve grill marks.
Check for a golden brown color and crispy skin before flipping.
Use tongs to turn them over carefully to avoid tearing the skin.
Step 5: Baste with BBQ Sauce

During the last 5-10 minutes of cooking, brush the chicken legs with your favorite BBQ sauce.
Be generous but avoid sauce contact with the flames to prevent burning.
This step enhances flavor and creates a sticky glaze on the chicken.
Flip the chicken occasionally while basting to ensure even coverage.
Step 6: Check Internal Temperature

Use a meat thermometer to check the chicken’s internal temperature, aiming for 165°F.
Insert the thermometer into the thickest part of the meat, avoiding the bone.
Once it reaches the desired temperature, remove the chicken from the grill.
Properly cooked chicken should be juicy and no longer pink at the bone.
Step 7: Rest Chicken Legs

Transfer the grilled chicken legs to a plate and cover loosely with aluminum foil.
Let them rest for about 5-10 minutes before serving.
This allows the juices to redistribute, keeping the meat moist.
Avoid cutting into the chicken immediately to maintain its juiciness.
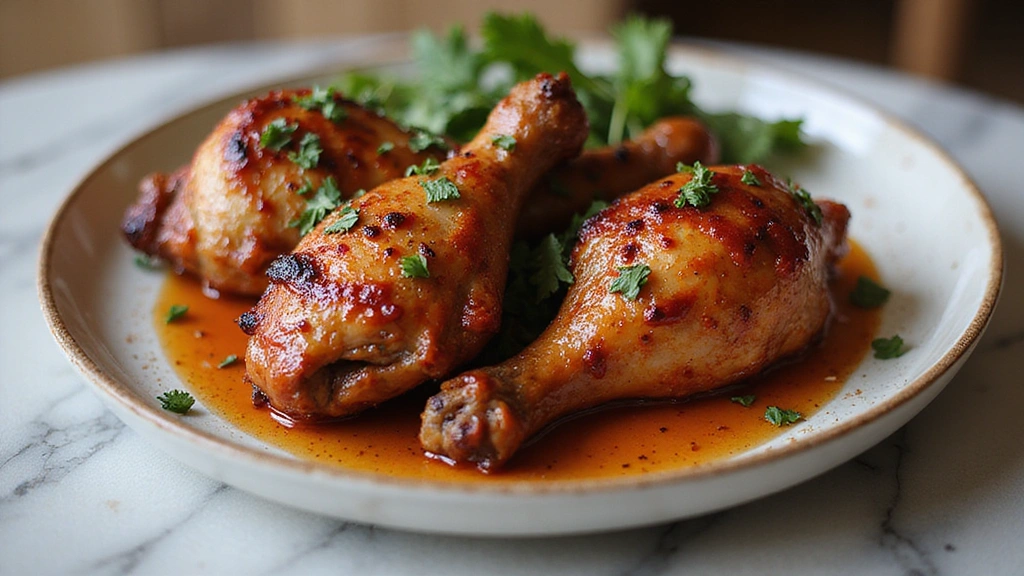
Step 8: Serve and Enjoy

After resting, serve the chicken legs on a platter with additional BBQ sauce on the side.
Garnish with fresh herbs or sliced green onions for added color.
Encourage guests to dig in and enjoy the crispy, juicy flavors.
Pair with classic sides like coleslaw or cornbread for a complete meal.
Critical Timing and Temperature Guide
Marinating Time: Aim for at least 1 hour up to overnight. Proper marination ensures flavor penetration and tenderness. Avoid marinating too long as the acid can break down the meat excessively.
Grilling Time: Cook chicken legs for 10-12 minutes on the first side and 5-10 minutes after flipping, checking the internal temperature frequently. Look for a golden brown color and crispy skin.
Resting Time: Allow chicken to rest for 5-10 minutes after grilling. Resting is crucial for retaining juices and achieving moist meat.
Pro Tips for Grilled BBQ Chicken Legs Recipe That’s Crispy And Juicy
• Ingredient Selection: Choose high-quality chicken legs with skin on for the best flavor and texture.
• Preparation Secret: Marinate overnight for maximum flavor absorption, enhancing the overall taste.
• Temperature Management: Ensure the grill is preheated properly to avoid sticking and promote even cooking.
• Texture Enhancement: For extra crispiness, pat the chicken dry before marinating to help the skin crisp up.
• Flavor Layering: Use a combination of spices in the marinade to create a depth of flavor that stands out.
• Make-Ahead Strategies: Marinate the chicken legs the night before for a quick grilling session the next day.
• Restaurant-Quality Finishing Touches: Brush with a final layer of BBQ sauce just before serving for a glossy finish.
• Equipment Optimization: Use a two-zone fire setup on your grill to manage flare-ups and control cooking speed.
Troubleshooting Common Issues
• Chicken Skin Not Crispy: This could be due to excess moisture on the skin. Pat the chicken dry before marinating and ensure the grill is hot enough.
• Chicken Overcooked: If chicken is dry, use a meat thermometer to monitor cooking time closely. Aim for 165°F for perfectly cooked meat.
• BBQ Sauce Burning: Apply BBQ sauce in the last few minutes of cooking to prevent burning from the sugar content.
• Uneven Cooking: Ensure chicken legs are of similar size and thickness. Rotate them on the grill for even heat distribution.
• Flavor Lacking: If the chicken lacks flavor, consider marinating longer or adding more seasoning to the marinade.
Variations and Regional Differences
• Alabama White Sauce Variation: This version uses a tangy mayonnaise-based sauce instead of traditional BBQ sauce, adding a creamy element.
• Caribbean Jerk Style: Incorporate jerk spices into the marinade for a spicy, aromatic twist that highlights tropical flavors.
• Teriyaki Glaze: Substitute BBQ sauce with a sweet teriyaki glaze for an Asian-inspired version.
• Modern Interpretations: Consider using a dry rub instead of a marinade for a different flavor profile while still achieving a crispy skin.
Food Science Behind the Recipe
• Maillard Reaction: This chemical reaction between amino acids and reducing sugars occurs during grilling, creating the desirable brown crust and complex flavors on the chicken skin.
• Acid-Base Balance: The acidity in the marinade helps to tenderize the chicken by breaking down proteins, resulting in a juicier final product.
• Fat Rendering: The fat in the chicken skin renders during grilling, contributing to both flavor and moisture, creating that coveted crispy texture.
Frequently Asked Questions
What’s the most common mistake people make when preparing Grilled BBQ Chicken Legs? Overcooking is the top mistake, leading to dry chicken. Use a meat thermometer to ensure you reach the perfect internal temperature.
Can I prepare components of this dish in advance? Yes, you can marinate the chicken legs up to 24 hours in advance for deeper flavor.
How do I adapt this recipe for dietary restrictions? For gluten-free, ensure the BBQ sauce is certified gluten-free, and for lower fat, remove the skin before grilling.
What’s the best way to store and reheat leftovers? Store in an airtight container in the refrigerator for up to 3 days. Reheat in the oven at 350°F until warmed through to maintain crispiness.
Can I freeze this dish? Yes, freeze the marinated chicken legs before cooking. Thaw in the fridge overnight before grilling.
What wine or beverages pair best with this dish? A chilled Riesling or a light lager complements the smoky and sweet flavors of BBQ chicken.
How can I scale this recipe up for a crowd? Simply multiply the ingredients proportionally, ensuring you have enough space on the grill to accommodate all the chicken legs.
Serving and Presentation Guide
• Traditional Presentation: Serve grilled chicken legs on a wooden platter, garnished with fresh herbs and lemon wedges for a rustic look.
• Modern Plating Ideas: Arrange on a sleek white plate with a drizzle of BBQ sauce and a sprinkle of sesame seeds for an elegant touch.
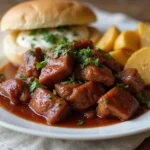
• Accompaniment Suggestions: Serve with coleslaw, corn on the cob, or baked beans for a classic BBQ meal.
• Special Occasion Presentation: Elevate the dish by serving on a multi-tiered platter with colorful sides for a stunning display at parties.
Conclusion
This Grilled BBQ Chicken Legs recipe is sure to become a favorite at your summer gatherings.
With its crispy skin and juicy meat, it delivers a taste that is hard to resist.
I encourage you to try this recipe and enjoy the delicious flavors with family and friends.